


 All Articles
How to Add a New Booking from the Timeline
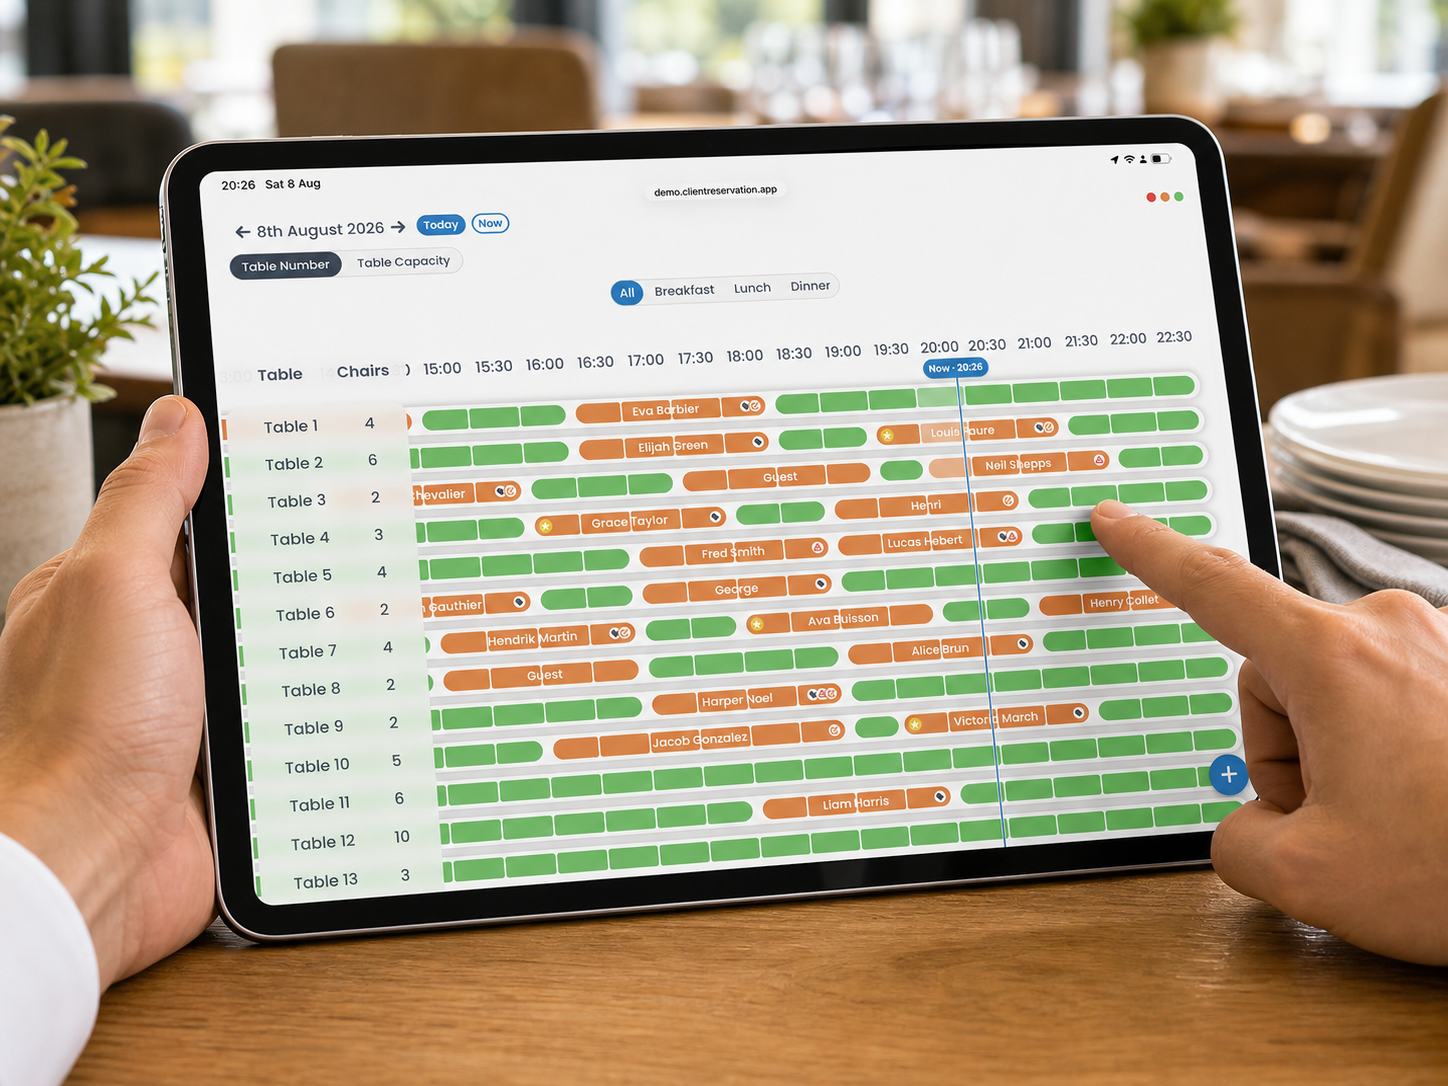
The Timeline provides a visual overview of every table and booking throughout the selected day. You can create a new reservation by selecting an available time directly against the required table.
1. Create a booking from an available time
- From the Home screen, select Timeline.
- Check that the correct venue is selected. If necessary, use the venue selector to change it.
- Use the date controls to choose the required booking date.
- Choose Table Number to sort the tables numerically, or Table Capacity to sort them by the number of chairs. Sorting by capacity can help you quickly find a table that is the right size for the number of guests in the party.
- Find the required table on the left-hand side of the Timeline.
- Move across the table’s row to the required start time.
- Select an available space. Existing reservations appear as coloured booking blocks and cannot be selected to create a new reservation.
- The New Booking page opens automatically and carries across:
- The selected date.
- The selected venue.
- The selected table.
- The selected start time.
- The available duration.
The initial duration is up to two hours. It may be shortened automatically if the venue closes or another booking occupies the selected table sooner.
2. Add the customer
- Enter the customer’s name in Enter Client Name.
- If the customer already exists, select them from the suggestions. This connects the reservation to their customer profile and displays relevant preferences or previous booking information.
- Enter or check the customer’s email address and phone number.
You can leave the name empty for a guest or walk-in booking. A valid email address is required to send confirmations, reminders or a deposit request.
3. Complete the booking details
- In Restaurant Booking, check the details carried across from the Timeline.
- Select Number of People and choose the party size.
- Check the Booking Time. Select it to choose another available time if required.
- Check the Booking Duration. You can change it to another available duration.
- Review Assign Table. The table selected on the Timeline should already be assigned.
- To change the table, choose:
- None: Creates the reservation without assigning a table.
- Choose: Allows you to select the required table or tables.
- Auto: Lets the system assign suitable tables automatically.
4. Add optional information
- Select Show Additional Options if you need to record more information.
- Add any relevant:
- Booking tags.
- Allergies or dietary requirements.
- Special occasion.
- Booking notes.
These details apply to this reservation and do not automatically change the customer’s profile information.
5. Choose which messages to send
- Review the available post-booking actions:
- Send Deposit Request: Emails a secure deposit payment link when deposits are enabled and a valid email address is available.
- Send Confirmation: Sends the standard booking confirmation email.
- Send Reminders: Schedules reminder emails for three days and 24 hours before the booking.
- Turn off any action you do not want the system to complete.
6. Create the reservation
- Review the booking summary, particularly the date, time, party size, duration and assigned table.
- Select Create Booking.
- If the system identifies a possible duplicate or scheduling conflict, review the warning before deciding whether to continue.
Once created, the reservation appears against its assigned table and time on the Timeline.