


 All Articles
How to Choose an Audience Using Customer Tags
Customer tags allow you to send relevant marketing emails to selected groups instead of your entire mailing list. You can combine tag filters with VIP status to create a more specific audience.
Only customers who have opted in to receive marketing emails will be included.
1. Choose your audience
- From the Home screen, select Marketing.
- Create a new campaign or open an existing draft.
- Finish designing your email and check that its subject is correct.
- Select Send, followed by Send Campaign.
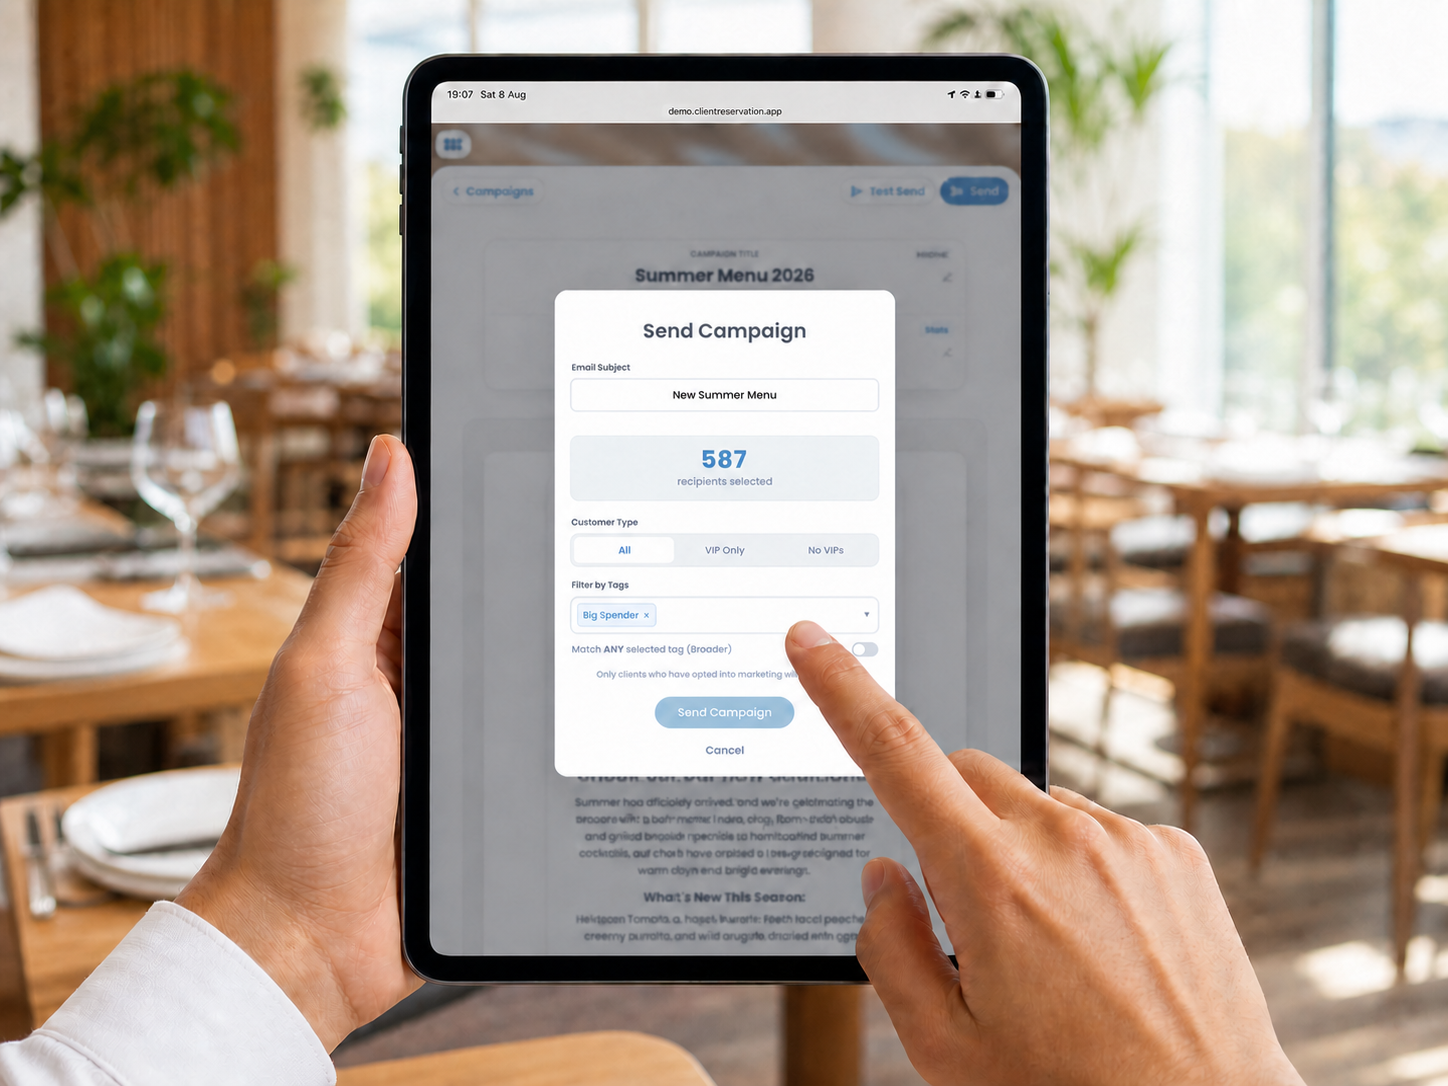
- Wait while the system calculates your audience. The number of customers currently selected will appear at the top of the window.
- Under Customer Type, choose:
- All: Includes both VIP and non-VIP customers.
- VIP Only: Includes only customers marked as VIPs.
- No VIPs: Excludes customers marked as VIPs.
- Select Filter by Tags, then choose one or more customer tags. Selected tags appear inside the field.
- Choose how multiple tags should be matched:
- Match ANY selected tag: Includes customers who have at least one selected tag, creating a broader audience.
- Match ALL selected tags: Includes only customers who have every selected tag. Turn on the toggle to use this stricter option.
- Check the live recipients selected total. It updates automatically when you change the customer type, tags or matching option.
- To remove a tag, select the × beside its name. The recipient total will update again.
- Once you are happy with the audience, select Send to [number] people.
- Review the final confirmation, including the recipient count, customer type and tag filter.
- Select Confirm & Send to send the campaign, or Cancel to adjust the audience.
For example, selecting Birthday and Regular Customer with Match ANY includes customers with either tag. Using Match ALL includes only customers who have both tags.
2. Important information
Customers are included only when they have a valid email address and have opted in to marketing. Archived customers are excluded, and duplicate email addresses are counted only once.
If your filters produce no eligible recipients, the send button remains unavailable. Try removing a tag, changing from Match ALL to Match ANY, or reviewing the selected customer type.