


 All Articles
Getting Started with Email Marketing
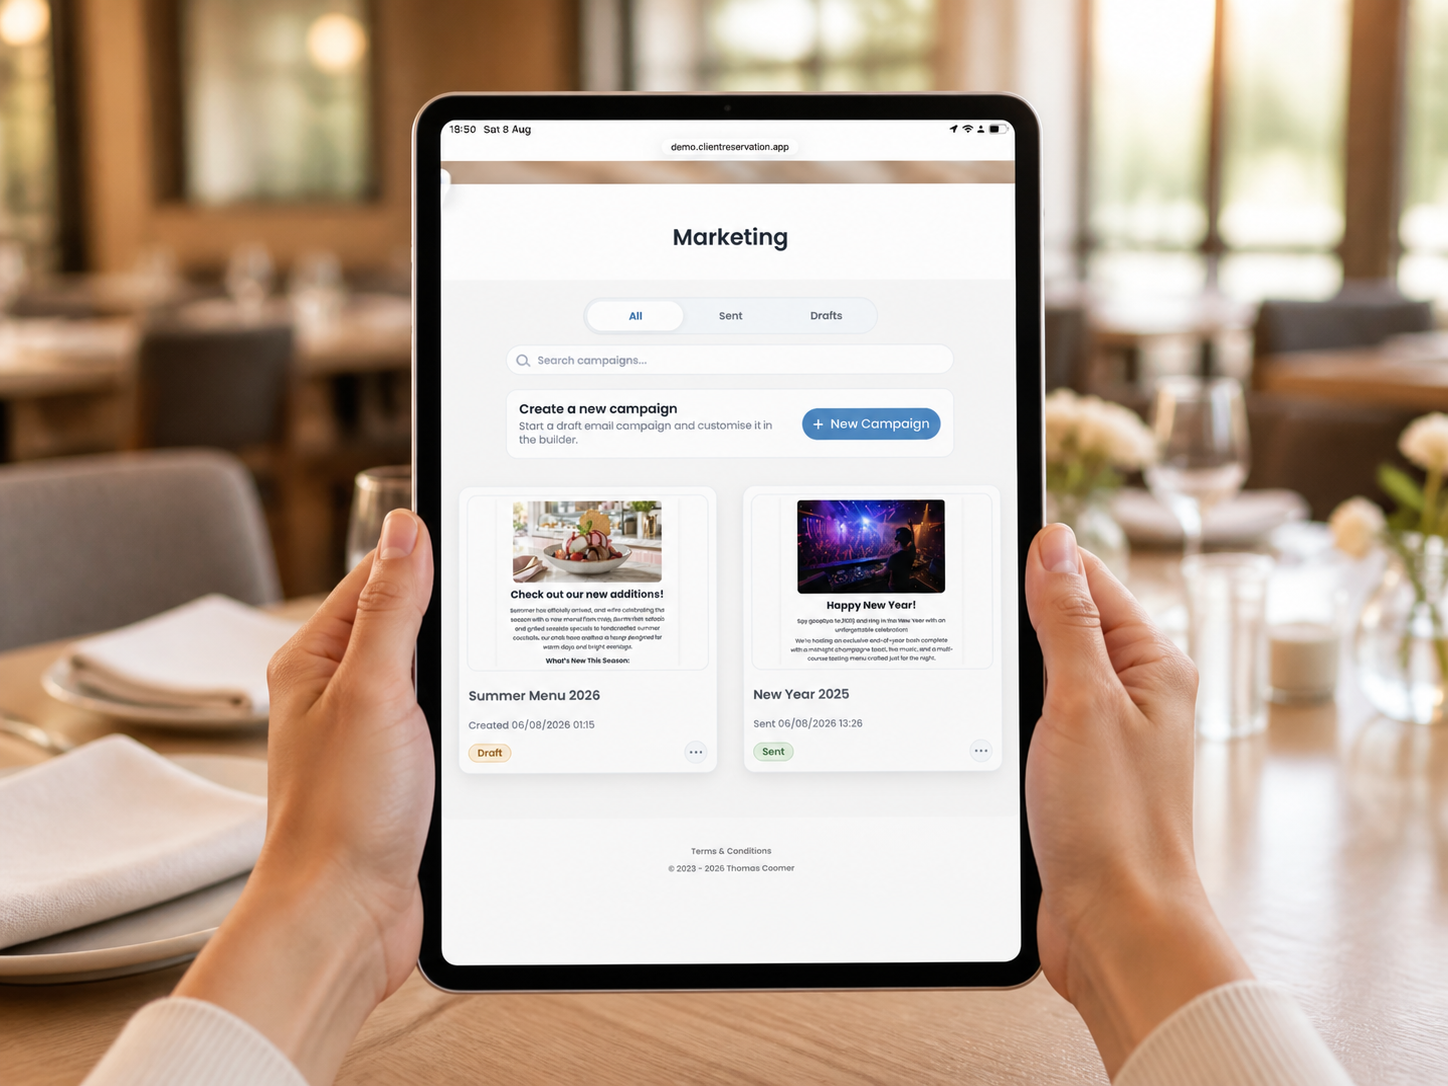
The built-in Email Marketing feature allows you to create branded email campaigns, send them to selected customers and review their performance from within Client Reservation.
Only customers who have opted in to marketing are included in the campaign audience.
1. Open Email Marketing
- From the Home screen, select Marketing.
- The Marketing page will display your existing email campaigns.
- Use the options at the top to view:
- All: Displays every campaign.
- Sent: Displays campaigns that have already been sent.
- Drafts: Displays campaigns that are still being prepared.
- Use Search campaigns to find a campaign by its title.
Each campaign card shows its status and the date it was created or sent.
2. Create a campaign
- Select New Campaign.
- Enter an internal campaign name, such as Summer Menu Launch.
- Enter the Email Subject customers should see in their inbox.
- Select Next to create the draft and open the email builder.
The campaign name is used to identify the campaign inside Client Reservation and is not shown to customers. The email subject is customer-facing, so it should clearly explain what the email is about.
3. Design the email
The built-in email builder allows you to create the campaign’s content and preview how it will appear to customers.
You can use the builder to:
- Add headings and body text.
- Add images.
- Add buttons and links.
- Change colours and text styling.
- Reorder content.
- Remove content that is no longer required.
- Switch between editing and previewing the email.
Campaign changes are saved to the draft as you work, allowing you to leave the builder and return later.
Before sending, check that the email:
- Has a clear subject.
- Uses accurate and up-to-date information.
- Contains working buttons and links.
- Looks correct in Preview mode.
- Includes images you own or have permission to use.
Uploaded images are processed through an image safety check before they can be used.
4. Send a test email
A test email lets you check the campaign before sending it to customers.
- Open the campaign in the email builder.
- Choose the option to send a test email.
- Confirm or edit the email subject.
- Enter the email address that should receive the test.
- Send the test and review it in the recipient’s inbox.
- Check the layout, spelling, images and links.
A test email is sent only to the address you enter. It is not sent to the campaign’s customer audience.
5. Select the audience
When you are ready to send the campaign, you can choose which eligible customers should receive it.
The available audience controls include:
- All: Includes all eligible marketing customers.
- VIP Only: Includes eligible customers marked as VIP.
- No VIPs: Excludes VIP customers.
- Filter by Tags: Targets customers using one or more customer tags.
When using multiple tags, you can choose:
- Match ANY: Customers can have at least one selected tag, creating a broader audience.
- Match ALL: Customers must have every selected tag, creating a narrower audience.
The recipient total updates as you change the audience settings. Always review this number before continuing.
Customers who have not opted in to marketing are excluded automatically, even if they otherwise match the selected filters.
6. Review and send the campaign
- Confirm the final email subject.
- Review the number of selected recipients.
- Check the chosen customer type.
- Review any tag filters.
- Select Send.
- On the final Ready to send? screen, check the audience and recipient count again.
- Select Confirm & Send to send the campaign.
After sending, the campaign changes from Draft to Sent.
Sending a campaign cannot be undone. Complete a final check of its content, subject, links and audience before confirming.
7. View campaign analytics
- Return to the Marketing page.
- Select Sent to view completed campaigns.
- Open the required campaign or select Analytics from its actions menu.
The Campaign Performance section can include:
- Delivered: Emails successfully delivered.
- Opens: Recipients who opened the email, including supported privacy-protected activity.
- Clicked: Recipients who selected a tracked link.
- Bookings: Tracked bookings created after campaign engagement.
- Bounced: Emails that could not be delivered.
- Link Clicks: Performance information for individual tracked buttons and destinations.
Analytics can continue updating after the campaign has been sent.
Open figures may include privacy-protected activity, such as Apple Mail preloading. This means a recorded open does not always confirm that a person viewed the email.
8. Manage drafts and sent campaigns
From a campaign’s actions menu, you can:
- Edit a draft.
- Delete a draft that is no longer required.
- Duplicate a draft or sent campaign.
- Open Analytics for a sent campaign.
To reuse a sent campaign:
- Open its actions menu.
- Select Duplicate.
- Confirm the duplication.
- Edit the new draft before sending it.
Sent campaigns are locked to preserve an accurate record of what customers received. They cannot be edited or deleted.
9. Email marketing checklist
Before sending any campaign, confirm that:
- The campaign has a clear internal name.
- The customer-facing subject is correct.
- The content has been proofread.
- All images display correctly.
- Every button opens the intended destination.
- A test email has been reviewed.
- The correct customer type and tags are selected.
- The recipient count looks reasonable.
- The Reply-To Email in Settings reaches the appropriate team.
- You are ready to send the campaign immediately.
For more detailed instructions, refer to the separate guides for creating emails with the email builder, choosing recipients with tags and understanding campaign analytics.